100 A Day to B Strong Fitness Challenge: Day 7

We're officially 1 week in! Day 7 Heaven ;-) Here's your workout:

Wondering what each of these exercises are good for? I’ll tell ya ;-)

  • Push-up + Oblique Crunch Combo: works our arms, [specifically chest & triceps], & of course our obliques. I love that push-ups are a moving plank & I love to play around with creating flows of multiple plank exercises - which you’ll notice as we get deeper into the challenge ;-) Oh! And Day 2 has tips for perfecting your push-up, so go back & take a read if you missed it & aren’t feeling confident about the push-ups in this workout!!
  • Step-ups: work our legs & booty! Just make sure that you step your entire foot onto the chair/bench you’re using. Don’t let your heel hang off the edge. The most important part of this exercise is to drive your heel down into the step as you stand - that way you’re engaging your glutes & not straining your knee.
  • Skip-ups: work everything that step-ups do in addition to your calves because it’s a jump! They also work all those muscles a little differently than step-ups do because step-ups develop more stability & strength while skip-ups develop your power [explosiveness], which is great for building a round booty ;-)

If you struggle with push-ups, go back to my Day 2 post to learn how to perfect your form & build up your strength so that you feel more confident with this exercise - which should be a staple in any training regimen, particularly an equipment-free, at-home one!!

100 A Day to B Strong Fitness Challenge: Day 6


Whattup B Strong Clique! It’s Day 6!
#100repsadaytobstrong 
Today we’re CRUSHING our abdominals & obliques ;-)

Here's a video demo of each exercise for you:

Does your lower back often KILL when you’re doing ab exercises where you lay on the floor & move your legs?? I’ve got some tips for you ;-)

  1. Keep your pelvis properly aligned! When the front of your pelvis drops down, your butt sticks out & low back arches. When the front of your pelvis lifts up, your stomach crunches & your butt tucks underneath you. If the 1st one is happening, that’s when your back is going to strain... When laying on your back, before you begin the movement, 1st pull your belly in & press your lower back toward the floor to tilt the front of your pelvis upward. From there, your goal is to hold your pelvis in that position as you go through the motions with your legs!
  2. Squeeze your butt!! Squeeze your butt cheeks right now & see what happens. I'm serious! LOL. The front of your pelvis tilts upward! Exactly what we just went over above! So... use your abs AND your booty at all times & definitely remember to use your butt as your legs get lower to the floor - that’s when keeping your pelvis neutral is most challenging.
  3. Your range of motion should be as big or small as your strength will allow!! Does lowering your legs to hover just inches off the ground make your lower back arch no matter HOW HARD you try to do steps 1 & 2? [Super frustrating, I know.] But don’t lower your leg as low! If you can only keep your abs engaged up until you’ve lowered half way, then that’s how much you can move for now! And your range of motion WILL get larger! I promise!! So long as you commit to proper form so that you actually strengthen your abs ;-)

Applying these techniques is not only a game changer, it’s CRUCIAL in order to earn results from your hard work!! Send this along to a workout buddy who needs to see these fit tips!

100 A Day to B Strong Fitness Challenge: Day 5

Day 5 we workin’ for the a$$ to match our sass [HAA!]
#100repsadaytobstrong

This workout couldn’t be ANY more simple. As long as you have stretchy pants on you can do this anywhere, anytime! #teamleggings [LOL!] Take as much rest as you need between rounds & time yourself to see how long it takes to complete. Then drop your time in the comments below when you’ve finished!


Here’s what we’re workin out today:
Sumo Squats: work your legs & booty with an emphasis on your inner & outer thighs [adductors & abductors]. Start standing with your feet wide & toes turned out. As you squat down, press your knees open wide so that you feel your hips working. As you stand up, act as if you were trying to glide your legs together like Michael Jackson!! Just don’t actually let your feet move haha. The intention is to feel your inner thighs engage as much as possible!

Sumo Squat Hold + Pivots to Lunge: builds endurance in your legs while improving core & hip stability. Always keep your lower abdominals pulled tight so that your pelvis stays neutral & your lower back doesn’t arch - especially when you pivot to your lunges. When you drop your knee down to a lunge, be sure to twist your whole torso to face that direction. Your shoulders & pelvis should always move together! ALSO! Whichever knee drops down when you lunge - squeeze that butt cheek nice & tight 😉 That’s another way to ensure that you’re keeping your hip stable & posture in check!

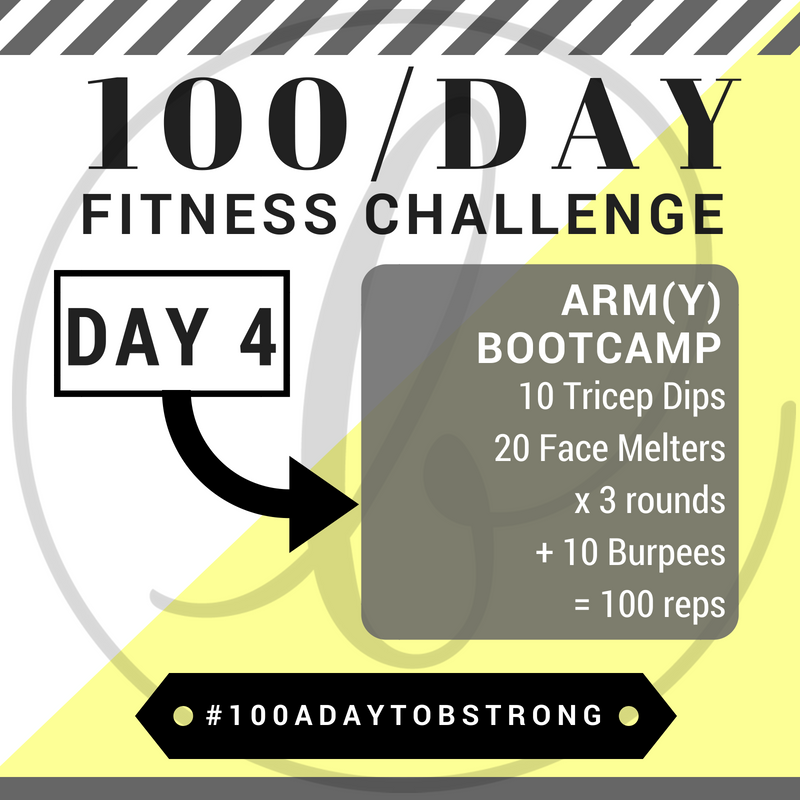
100 A Day to B Strong Fitness Challenge: Day 4

Day 4 is on a new level!! Get ready to get sweaty!! [LOL]
Here's what's on the docket:


  • Tricep Dips: work the back of our arms - our triceps - which also happen to be the largest muscle group in our arms! Why is that important? Want to build definition in your arms quickly [ahem, #sweatingforthewedding ;-)]? Better show your triceps some action 2-3x a week! Bent knees is easier, straight legs is more challenging. Be sure your to engage your lats, [I wrote all about this on yesterday’s post about avoiding neck pain during ab workouts!], & keep your elbows from bowing out to the sides as you bend & lower - keep them tucked beside your body so that they’re stacked over your wrists at all times!
  • Face melters: work your abdominals of course, but also get your shoulders BURNING from stabilizing a plank where your feet are elevated - but the burn is SO good! Again, keep your lats engaged - super challenging because your shoulders get so tired - but also isolate your legs! Try to keep your hips in the same are in space through the entire set - don’t let them rise & fall like your feet are!
  • Burpees: get that <3 pumpin ‘cause you’re jumpin! While the push-up is optional, the proper form isn’t: 1. when you jump your feet back to a plank, don’t let your lower back arch so your hips sag toward the ground! 2. when you jump your feet forward, land in a gorilla squat: both feet land just outside of their respective hand *with the soles of your feet completely flat on the ground* - landing on just your toes is not amazing for your knees. Move as slowly as is necessary to keep your form in check ;-)

Now there is a TON of plank action today, so if your wrists aren’t thrilled about it, keep reading to learn about how to prevent irritation!

  1. It’s all about alignment, baby ;-) When you’re in a plank, you should have a straight line from your shoulders to your elbows to your wrists... as well as from your shoulders to your hips to your heels. When those straight lines become curvy, your wrists will let you know immediately - LOL! One of the worst ones I see with exercises like mountain climbers & face melters is the shoulders moving forward & ahead of the wrists. This is bending them backward! OUCH! So when you’re moving in a plank, be sure to stay static - move in place.
  2. Engage your *whole* hand! Oftentimes, without even realizing, people will create a ton of torque in their wrist joint because they sit all the weight they’re holding up in the heels of their palms... like when you’re super fatigued & practically clawing your fingertips into the floor out of pure desperation hahaaa... So, intentionally press your entire palm & the ends of your fingers into the ground to engage the muscles that stabilize your wrists.
  3. Do it with your hands on a flat, hard surface. For some of us, the cushioning of a mat/rug may work against us when it comes to keeping our wrists properly stabilized. Go ahead & keep your knees over the mat, but walk your hands forward so that they’re on the flat, hard floor.

If these tips aren’t helping when you’re doing push-ups, go back to Day 2 to learn about how to maintain proper alignment specifically for the push-up ;-)

Hope that helps, fam!! <3

100 A Day to B Strong Fitness Challenge: Day 3

#100repsadaytobstrong Day 3 baby! And it’s a lovely, gentle workout that’s easy like Sunday mornin' ;-)

This workout feels amaaaazinggg if you have tight hips and/or tension in your lower back. Why? Because these exercises boost blood flow to that area of your body while bringing length to areas that commonly hold a lot of tension. The stretching + the heat from the blood flow doesn’t just feel good, it works WONDERS for your body in reducing inflammation & tension that causes pain.


  • Knee Tap Crunches: work your abdominals. Your focus here is to peel your spine up vertebrae by vertebrae until you can tap your knees with your fingertips. Avoid using momentum by throwing your head/arms forward!! Engage your lats, [if you’re not sure what that means, check out the Superman exercise from Day 2], & focus on using your abs!

Do you struggle with neck pain while doing core work? Read up below for tips on how to perfect your form so that abdominal exercises aren't a "pain in the neck"!

  • Side Laying Leg Circles: work your obliques & abductors, [outer thighs], while lengthening your hamstrings & adductors, [inner thighs]. For this exercise, be sure to always keep your working leg straight & to hinge your hips 👉🏼 torso is straight, legs are straight, but hinge at your hips so your body is in a wide V shape. Also, similar to the clamshells from Day 1, focus on using your abs & obliques to keep your hips stacked. No matter where your leg goes, your top hip shouldn’t budge!! In addition, only make your leg circles as big as you can without your knee bending or hips unstacking. The more flexible you are, the larger you’ll be able to make your circles.

WHY DO AB EXERCISES KILL MY NECK?!

  1. Check your posture! First off, pull your belly in & press your lower back toward the floor to prevent any arching in your lower back. But remember that your neck is also part of your spine! If it often aches while doing ab exercises, you may be sticking your chin out like a pigeon does when it walks [LOL] OR pulling your chin down to your chest. This hyperextends & fatigues the muscles that support your head. Instead, stabilize your neck & initiate crunching movements by lifting your shoulder blades off the ground. Your head is attached to your shoulders, so it’ll follow automatically ;-)
  2. Make sure you’re engaging your lats. This is CRUCIAL for every exercise EVER. To engage your lats, do the opposite of shrugging your shoulders: broaden them as you pull them down & away from your ears. If your lats disengage, your shoulders will collapse forward & lift toward your head, which creates tension in your neck, chest & shoulders. Pulling that tension down into your powerhouse is not only going to reduce tension in your neck, it’s going to properly load your abdominals so that you’re *actually* strengthening them with the exercise.
  3. Use your strength to control the movement at all times! Using momentum to crunch by throwing your head &/or arms forward is basically giving yourself whip lash LOL.. And letting gravity take over & just back-flopping onto the floor instead of lowering back with control is uncomfortable for obvious reasons. With these knee tap crunches, how much you crunch up is 100% dictated by your abdominal strength. Initially, you may only be able to lift your head & the top of your shoulders... but you’ll improve more quickly than you think - so long as you follow all the tips above ;-)